Showing posts with label how to. Show all posts

September 13, 2015

what to do with herbs: tomato sauce

Well, aren't I behind on blog posts! One of the things I've been doing this past month is turning most of the tomatoes I harvested into sauce.  Last year, my method was a bit more time consuming, as I was chopping them all up and cooking them on the stove for most of the afternoon.  This year, I worked out a slightly quicker method, although it's best if you start the night before.

yum!
First, prepare the tomatoes as you wish.  I just core out the green center of the big ones and cut off any bad bits, but you can also remove the skins and seeds - but I don't bother.  Put your prepared tomatoes in a blender and blend until all chopped up - mine comes out a bit like a smoothie.  I love seeing how the different tomato colors affect the color of the blend.


Next pour your mix into a crock pot until full, or you run out of tomatoes.  You can also add some small whole tomatoes now or an hour-ish before serving to add some chunkiness.  I've been allowing this to reduce overnight and then adding more blended tomatoes in the morning - but this is just because I have so many tomatoes and a fairly small crock pot.  To help with reducing the sauce, you can leave it uncovered, propped, or use a splash screen.  However, if you're not careful, you could reduce it too much and burn the sauce - yes, you can burn things in a crock pot, I was surprised too.


Whenever you have time before dinner - although give the sauce enough time to take in some of the flavors - you'll want to add some herbs!  And maybe some vegetables too, peppers and summer squash work well.  As for herbs, I love sage, thyme. basil, and a bay leaf.  You'll probably want to add salt and sugar as well.


Basil should be added last if you're using it, as overcooking can weaken the flavor.  Taste the sauce occasionally to see what you think.  I've also been cooking up onions. garlic, and sage in olive oil and then adding that to the sauce near the end.  I picked up that idea from this recipe for Chicken-Sausage and Bean Casserole with Sage.


Eventually, it'll be done and you'll be ready to have a delicious dinner!  Depending on how many tomatoes you used, you'll probably have some left over.  What I do is freeze it in half-pint jars and then use two jars whenever I want pasta again outside of tomato season.  You might also want to try freezing it in zip bags to reduce space.

What about canning, you ask?  I have yet to try it, but if you want to and don't have a pressure caner, you'll want to work with a different recipe that's more specific.  You'll probably not be able to add squash or pepper, and you will have to add lemon juice.

Have you ever made sauce of your own? How did you do it?  I'm considering trying it on an outdoor rocket stove sometime and see what taste the smoke adds to it.

Enjoy!
Amber

June 15, 2015

what to do with herbs: bug spray

This week has been fairly uneventful on the farm - just a bunch of weeding and watching over things as they grow.  However, the bugs have been biting lately, especially in the shady parts of the farm in the evening, so I thought I'd make some bug spray!  So, after checking out some websites (Homemade bug spray and Make your own essential oil), I thought I'd throw together an interesting concoction of my own.

First, I threw a bunch of herbs in a pot.  I used catnip, various mints, citronella-scented geranium, thyme, sage, and just a touch of rosemary and calenula - so, basically, everything I had on hand that might repel insects - plus calendula 'cause why not?

 Next, I ran them through a chopper quickly to reduce their bulk and start bringing out the oils, and back into the pot!  The chopper didn't like the sage stems, so next time I'll have to remove them first.


I poured grape-seed oil over the herbs to cover - really, any oil should work but I happened to have grape-seed oil, plus it's very light colored and scented.  I turned the burner on low, covered the pot, and stirred occasionally for a few hours.  I think I ended up at about 4 hours but probably less would be just fine.

Eventually, the herbs started to look well-cooked and strong-scented.  I deemed the bug spray oil done, let it cool a bit, and moved onto the next step.


To strain out the plant matter, I poured the concoction into a fabric lined strainer and let it drain slowly.  Very slowly.  The oil came out a very dark shade of green and strongly, but interestingly, scented.  After some pressing down with a spoon, I ended up with a bit over a half a cup of oil. Which more than filled the bottle I had on hand, as well as the tiny sprayer I had on hand.


Next time, I intend to use fewer types of herbs, so the scent is easier to pin down.  Definitely catnip and mint will have to be on the list, as those are supposed to be quite effective.  I was intending to dilute the oil with some witch hazel and apple cider vinegar, but my bottles were full, and it seems to work well, even if it's a bit oily.

How well does it work you ask? Well, I can't be sure yet but I tried it out today and I didn't notice too many bugs trying to bite.  After a few hours with it on, I did notice some gnats being annoying so I reapplied and they certainly stopped bothering me.  So far it's a success and I hope to  try it again with different herbs and possibly some dilution.  If you try to make your own bug spray, tell me how it turns out.

March 15, 2015

This week 3/15 & how I start the seeds

This week the weather has gotten warm and the snow is slowly melting away.  I'm sure many of you are just itching to go outside and maybe start gardens of your own.  So, in case you're considering starting some plants, I thought I'd go into different ways to do that and how I started mine as well.

Most commercial growers start their seeds in a flat filled with loose soil and then move them up to the plastic cell packs you'll see in most nurseries if you buy your transplants, but there are some downsides to those, so I've never really used them.  First, they're made of plastic that doesn't really last for many years and they aren't too good for the transplants root systems, as they'll just keep growing around and around once their roots reach the edge rather than stopping. That can cause problems for the adult plants.


Another option that I've used before are those peat pots you can fill with soil and then put straight in the ground where they'll decompose.  In some cases, I really like these and they tend to stop the root binding issue as, when they touch air (as opposed to plastic), the roots stop growing and wait for you to move them into something bigger.  Still, there are problems with these, as they take up a fair amount of room, peat tends not to be sustainable harvested, I've had some serious problems with them getting moldy, and I tend to knock them over more as they get top heavy easily.


So, this year, I'm trying something new: soil blocks.  To make a soil block, you have to use a soil blocker and "charge" it by plunging it into moist soil until all the spaces are filled up. Then you squeeze the handle to push them out on to something, usually a plastic mesh flat, but I'm considering making ones out of wire mess instead.   The blockers come in a variety of sizes, from under 1 inch up to 4, and each makes a different number of blocks with the smallest making 20 or so and the biggest just one.   The middle sizes also have different attachments, depending on the seeds you're planting or if you're potting up one of the smaller squares.  I love how easy it it to move them up to larger sizes. It saves a lot of space if I don't have to start everything in 2 inch pots right away and it saves seeds as I don't have to put more then one seed in each tiny block.  Also, since the soil is denser, more nutrients should be available to the plants than in a loosely packed pot - but, at the same time, there might be less air, which can be a problem. So far, I haven't noticed much of a difference yet.  Other problems with soil blocks, though, are that they can be pricey to start with, but they do last years. They take practice to use, and supposedly only certain potting mixes can be used as well. So far, the kind I buy from Johnny's works great and I even like it better than the actual soil block mix that came with the blockers. Still, it's something to keep in mind.  I've also had some problems with the middle sized blocks falling apart. It's possible I didn't charge that compartment enough or just handled it badly. Also, I'd prefer if the hole made for "potting up" the seedlings was a bit deeper as, right now, the old block sticks up. There are some plants where I'd like to be able to bury the stem deeper.  I still need to experiment a bit more, but so far I've liked them.


So what did I actually do this week?  Aside from starting tons of seeds (including various tomatoes, amaranth, large asters, holy basil, chamomile, and more yarrow), I've also been slowly moving up the seedlings into larger blocks, testing out using my car as a temporary greenhouse, and finalizing the sketch for the May Day artwork.  Oh, and I just put up a FAQ page and have been waiting (not so) patiently for the snow to melt so I can get to work preparing the soil.  I just can't wait to go outside even more.  I hope you had a great week as well!

Enjoy,
Amber

January 29, 2015

what to do with herbs: drying

     So now that you signed-up, you're wondering what you're going to do with all those herbs you're going to get! We'll get more into specific herbs later, but this series of posts will give you some ideas that you can experiment with on almost any herb.


Drying

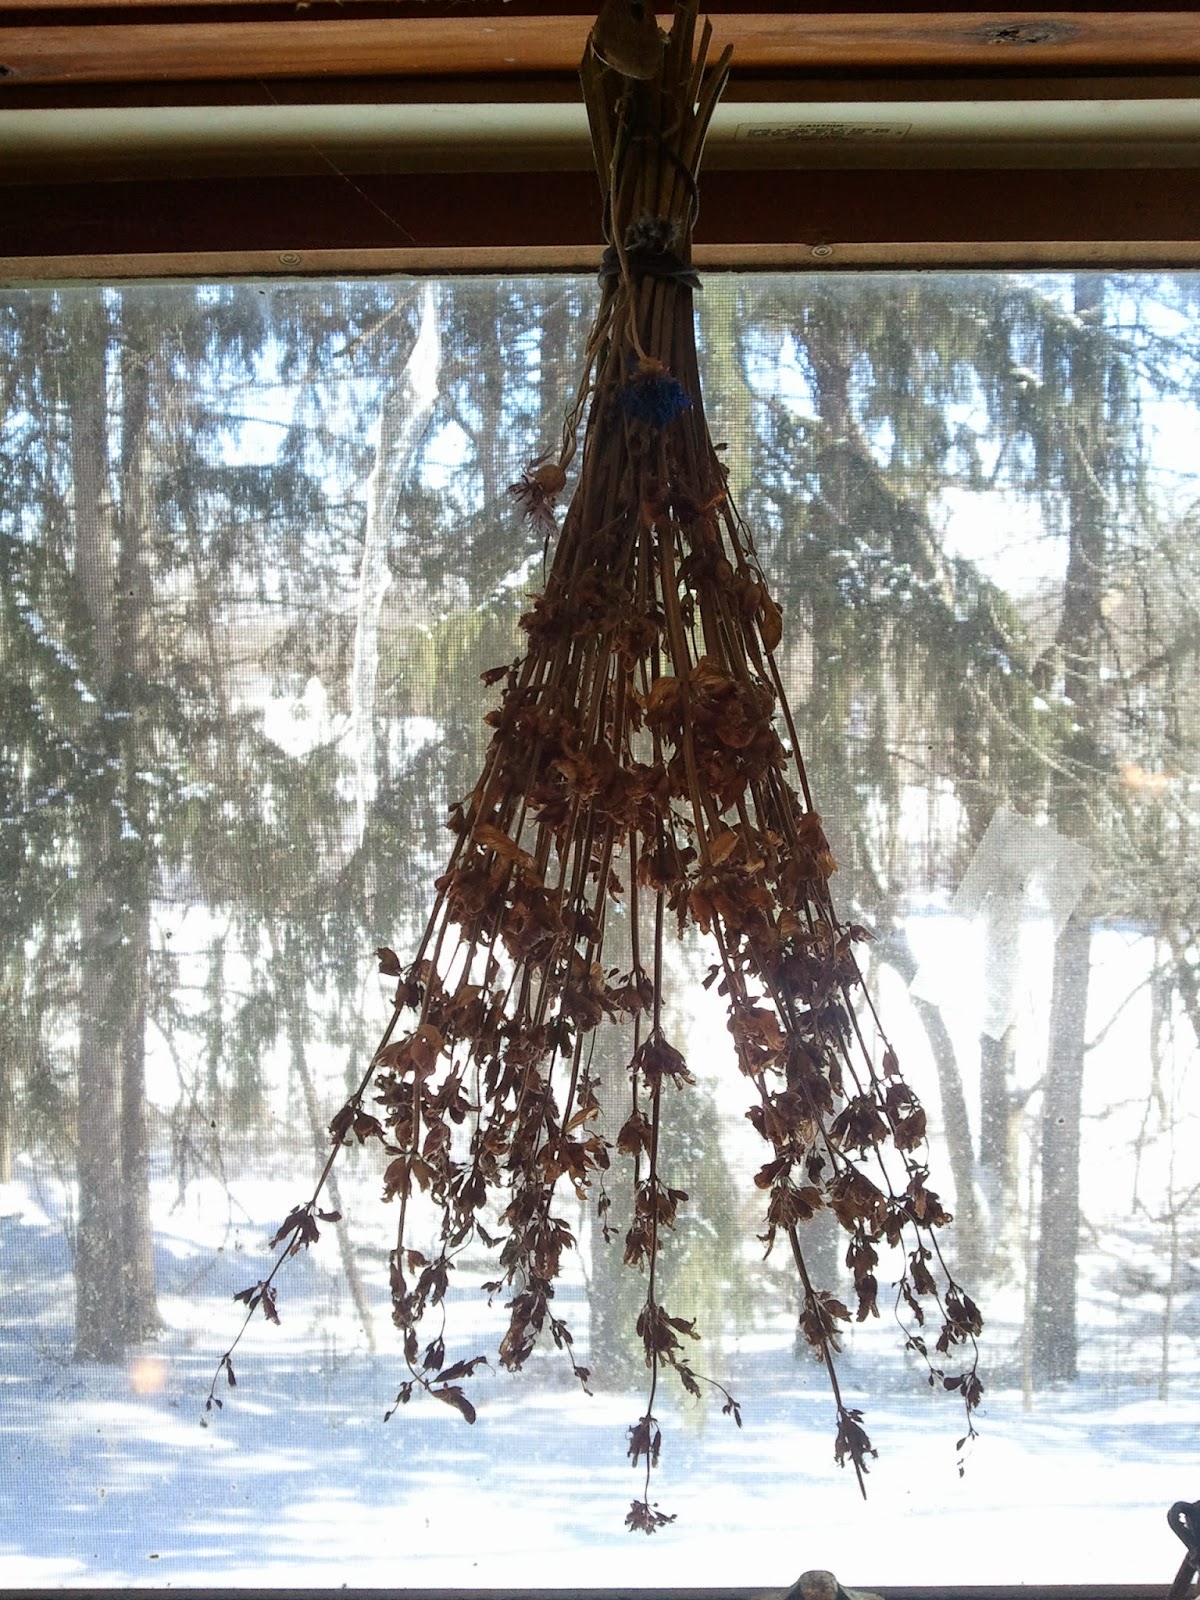
     Many people imagine bunches of herbs hanging from the ceiling to dry, and that's one of the easiest and most aesthetic ways to do it.  (Hey, no one's stopping you from just using them to decorate your house. They might make it smell fantastic, too.)  There are some drawbacks though to hang drying. The herbs can lose more of their essential oils and taste that way, especially if any sun is getting to them. Still, there should be plenty left for you to use and, if they're going to be used for their energy, you might actually want a little of infusion of sunlight.  In general, herbs will take 2 weeks to dry fully like this, but, if you have low humidity, it might go faster.


you can use dried flower bunches as window decoration


     You can also dry herbs in the oven at a very low temperature (probably as low as it will go until you get a good idea of what herbs are prone to burning and which ones are safe to dry at a higher temp) with the door open.  Place them in a single layer on a cookie sheet or clean window screen, if you have one.  Keep an eye on them and mix them up occasionally to encourage even drying and prevent scorching. This method may take several hours, depending on the herbs, but might get better results than air drying.


Stinging nettles lose their sting when dry, but you can still see the prickers. 

     I also have a dehydrator that's great for herbs (and even tomatoes and apples!).  If you have one, definitely check out the instructions and switch the trays often - or place different herbs on each tray with the fastest drying on top.  Experiment with your dehydrator and see what works best.  Like the oven, it should take a few hours and you might want to mix them occasionally to help them dry evenly, but it doesn't have to be as often as with the oven.


several bunches of common sage 

     Once I tried to dry herbs inside my hot car. It might work for you, but I made the mistake of not cracking a window and it ended up making my car and the herbs smell muggy and off to me.  I did try and get other people to smell it and they just smelled mint, and none of the off smell I was picking up - so maybe I just imagined it.  Either way, if you do try it, crack the window, try to keep them out of direct sunlight, and use an herb you won't mind smelling for weeks.  On the plus side, this method was incredibly fast and even. By the time I went to check on them, they were done!


yes, that's a car full of herbs. no, I'm not drying them all (yet)


     However you're drying your herbs, it's important that they get plenty of air circulation.  So, if working in large bunches, try not to make them too large and spread them out so air can flow through.  The only exception for that is when you're making smudge sticks. Those have to be tight together or they won't burn well.  For the oven, car, or even inside, you might want to get a screen so air can reach the bottoms, and be sure to place them in one layer not a big pile.  Also keep in mind that different herbs dry faster then others. in my experience, stinging nettles dry the fastest and sage the longest.  Also, some herbs will reabsorb moisture if they become damp or enter a humid area after drying. So placing them in an air tight jar or zip-lock once fully dry might be a good idea, and keeping then in a dark place would help them maintain potency as well. Sage is one that will also reabsorb moisture so, if you have a bunch hanging in your kitchen for use, some days it with crunch up nicely but other times you might have to tear it instead.  Once your herbs are dry, always look them over before using them to check for mold or discoloration, especially if it's been awhile, and discard anything that seems off.  Now that you have dried herbs, what are you supposed to do with them?  You'll just have to keep reading my blog to find out!


home dried herbs are greener then what you can get at the grocery store 


Have any questions about drying herbs? leave a comment!  Thanks for reading.

Enjoy,
Amber Haqu